Introduction to Drone Panorama Photography
MavicPro drone panorama photography is both a challenging and rewarding persuit. We are going to show you how to get the most out of your drone and extend its image capture capabilities by looking at what is involved in taking aerial drone panorama photographs. While this introduction centers around the MavicPro, it is non aircraft specific and the techniques discussed can be used with any drone to capture stunning aerial panoramas.
Rotary wings drones or Unmanned Aerial vehicles (UAVs) such as quadcopters or hexcopters are the perfect platforms for capturing and creating aerial panorama photographs. Drones with their 3 dimensional freedom of movement give the drone photographer the ability to capture images from any height (up to the legal limit) and in any direction allowing for an almost unlimited number of panorama opportunities. Just like terrestrial panorama photography, aerial drone photography is the process of acquiring multiple overlapping photographs and then seamlessly joining or stitching them together using software programs such as Autopano Giga or Photoshop to produce the final high resolution composite image.
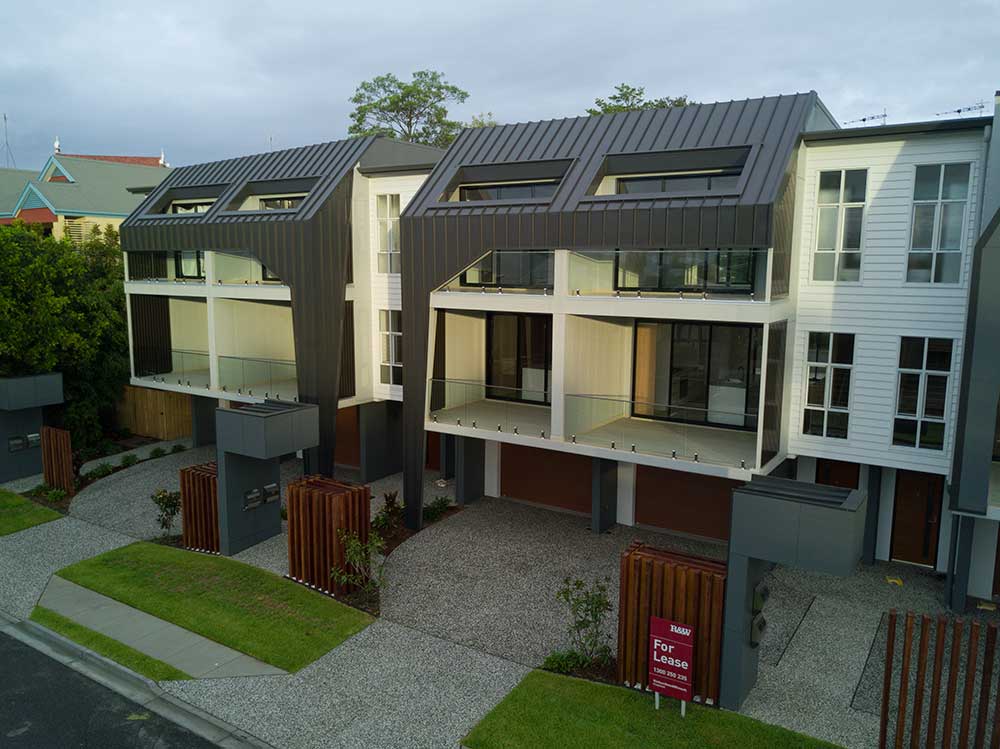
Aerial drone panorama photography is ideal for capturing stunning aerial cityscapes and landscapes as well as getting the big picture for residential, commercial and industrial real estate sales and marketing.
The key to producing good aerial panorama photographs is pre-visualizing and planning before going to site and a bit of luck with the weather, ie little or no wind.
Aerial drone panorama made up of 11 separate images taken with the MavicPro

MavicPro Drone Panorama Photography, the Good, the Bad & the Ugly
The MavicPro is the ideal drone for both landscape and cityscape drone panorama photography. Being small, lightweight, easily portable and with a low noise profile, it is fast to deploy and maneuver into position to acquire images. The downside of the MavicPro however is the small sensor and fixed lens. Being a small sensor, it suffers from reduced dynamic range and increased noise characteristics as a result of the inherent pixel well depth and the pixel size. The fixed lens also means the Mavic has a constant field of view that can introduce challenges when framing a scene.
These limitations can be overcome using well known and easily adopted terrestrial photographic processes. The limited dynamic range can be overcome using high dynamic range (HDR) techniques (the Mavic has the ability to exposure bracket) and the noise can be greatly reduced by taking multiple photographs of the same scene and stacking them together (a technique popular in astrophotography)
The drawback of the fixed 28mm focal length lens (35mm equivalent) can be overcome by rotating the MavicPro or alternatively pitching the gimbal up and down (while capturing an image sequence) and then using post processing software to create a panorama.
Drones can be used to take two type of panoramic images. These being planar (popular in ground based landscape photography) and spherical panoramas (the full environment the drone was in is captured and displayed). The type of photography discussed here is planar panoramas.
The Benefits of Drone Panorama Photography – The Good
Using drones to take photographs has the main advantage of having a camera that is not constrained to the ground. The drone’s height can be easily changed to shoot over foreground objects that obstruct the view and by flying higher, an almost unlimited number of photographic opportunities are presented.
The benefit of aerial panorama photography also include final images with increased pixels dimensions, a wider field of view allowing more elements into the image and the ability to experiment with cropping to get the best composition.
- Print BIG
- Wide Screen Format
- Crop for Composition
Print BIG – Wide Screen Format

Crop for Composition
One of six photographs taken with the MavicPro used in the making of the final panorama (4000 X 3000 pixels)
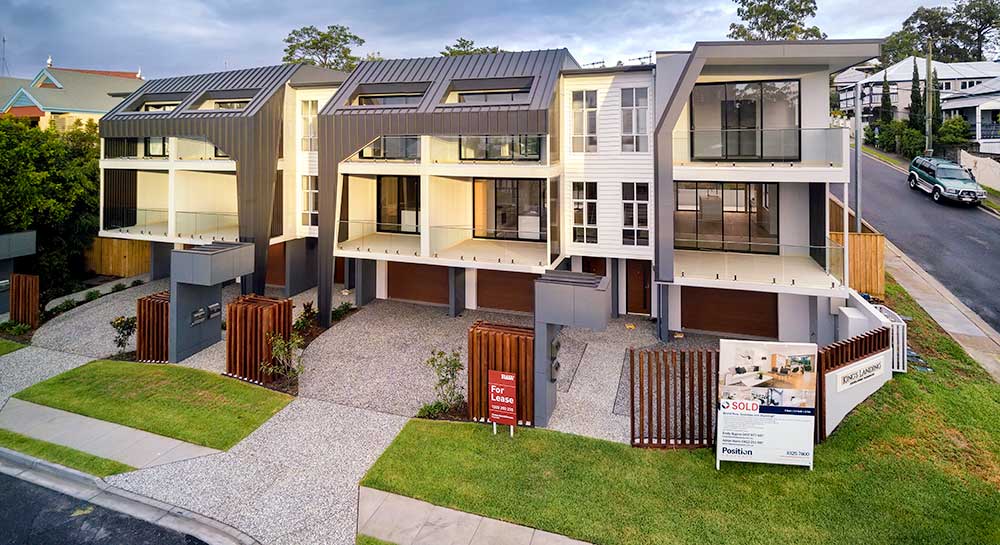
The final high resolution panorama created using Autopano Giga (10613 X 7213 pixels)
Cropped and colour corrected image from Photoshop (6791 X 3703 pixels)
The difficulties of done panorama photography – The Bad
One of the main advantages of aerial panoramas photography is the almost unlimited number of composition options available. Pick the drone height, pick the direction and photograph away. Change the height, change the direction and photograph away. etc etc. Being able to take so many photographs poses a problem of knowing which photograph belongs to which sequence.
To capturing panorama sequences, we rotate /yaw the drone to the right and capture the image sequence ensuring adequate overlap. Depending on the situation, we may adjust a camera settings such as shutter speed and re-shoot the sequence. The real problem arises back at the computer where the photographs need to be sorted into individual sequences for stitching and it is difficult to tell where one sequence starts amongst all the similar images.
Overcoming the issue of sorting sequences is easy. Between photographing different sequences, tilt the gimbal to point down to the ground and take a single photograph. This will act as a separator.
After taking photographs for panoramas, it can be a challenge to sort the images into their appropriate sequence

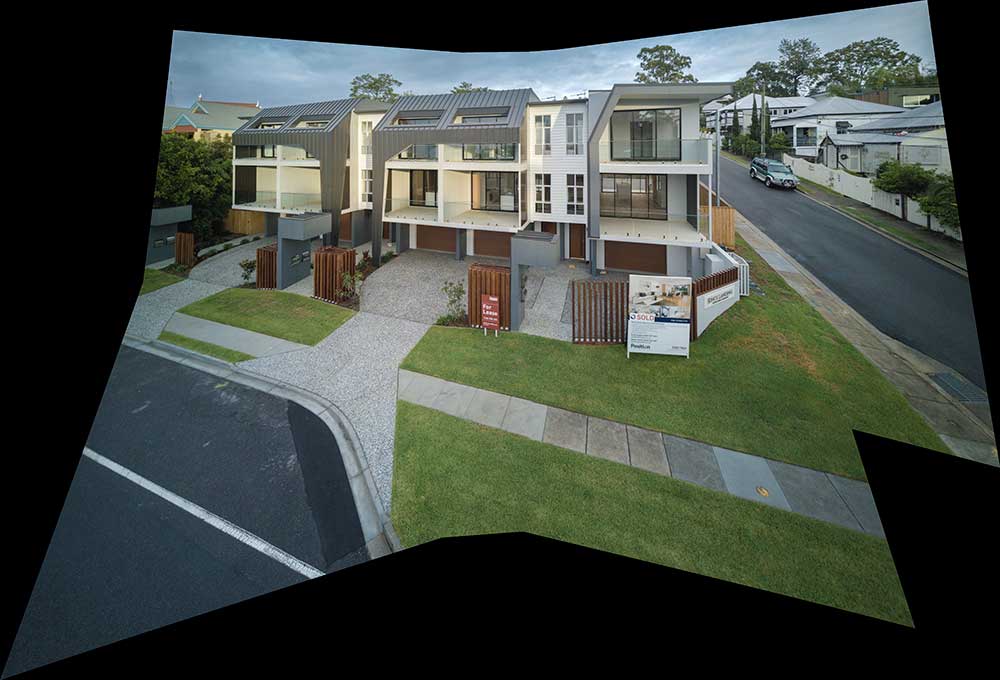
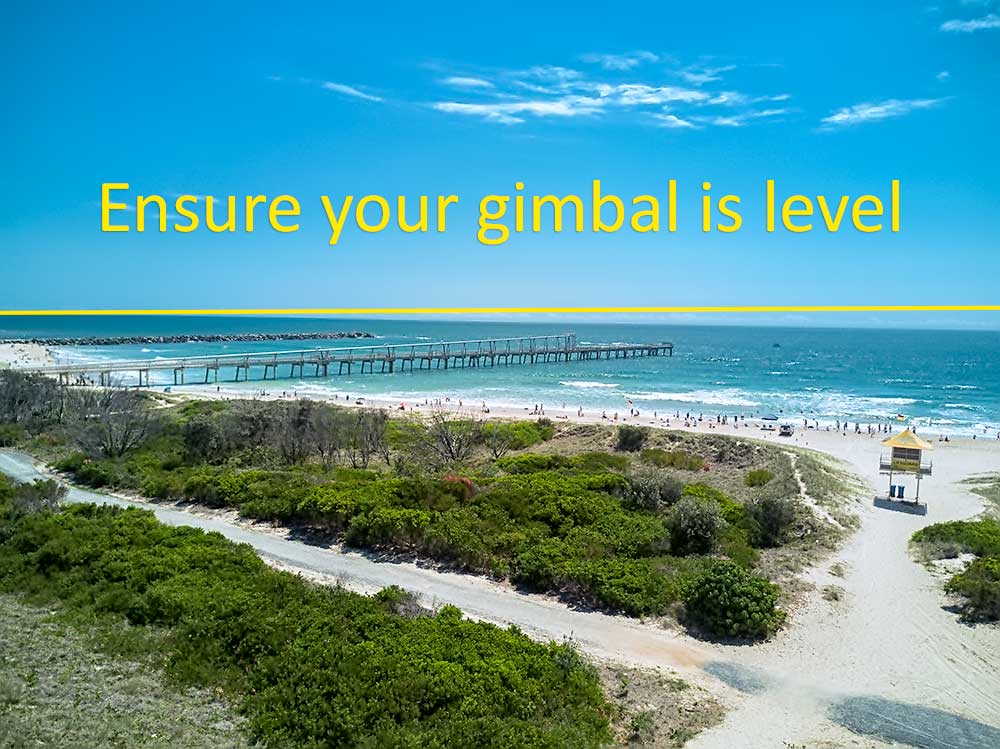
When shooting terrestrial panoramas, the camera is attached to a special panorama head connected to a tripod. Getting the tripod level is critical to ensure the photographs can stitch together without any artefact’s. With drone panorama photography the same can be said for the gimbal. Ensuring the gimbal is level is critical for the image sequence to have any chance of being stitched.
Three image sequence with stitching artifacts resulting from a non-level gimbal

At the mercy of the wind – The Ugly
Wind is the main problem when doing aerial drone panoramas as the drone can drop in altitude between photographs. To overcome this, capture the sequence from left to right and then right to left and use the images with the closest matching altitudes.
Location Scouting
To save time and get the best drone panoramas, we always undertake location scouting prior to flying. Google Earth Pro or Google Maps are invaluable to identify launch / landing points and any natural or purpose built structures in the vicinity. The benefit of using Google Maps is its 3D navigation option. This provides an aerial view in 3D that gives a rough indication to the possible drone panorama composition.
When capturing panoramic cityscape and urban vistas, we favour launching the MavicPro from local parks usually in the early hours of the morning (when the light is the best and there is usually minimal wind) or during a weekday when there is less pedestrian traffic around.
When photographing in any city, we operate the MavicPro as a flying tripod. Launching it to the desired height, photographing and then returning to the ground. This type of operation is the safest option as the drone is not flown over roads or over peoples property. If we realise that capturing the aerial panorama may be better 100 metres down the street, then we will land the drone and relaunch from a suitable location near there.
- Avoid flying over main roads/freeways
- Always keep the drone within visual line of sight
- Avoid (like the plague) flying over or near government or educational institutions unless adequate permissions granted
Location scouting with Google Maps - fast & from the comfort of your own home
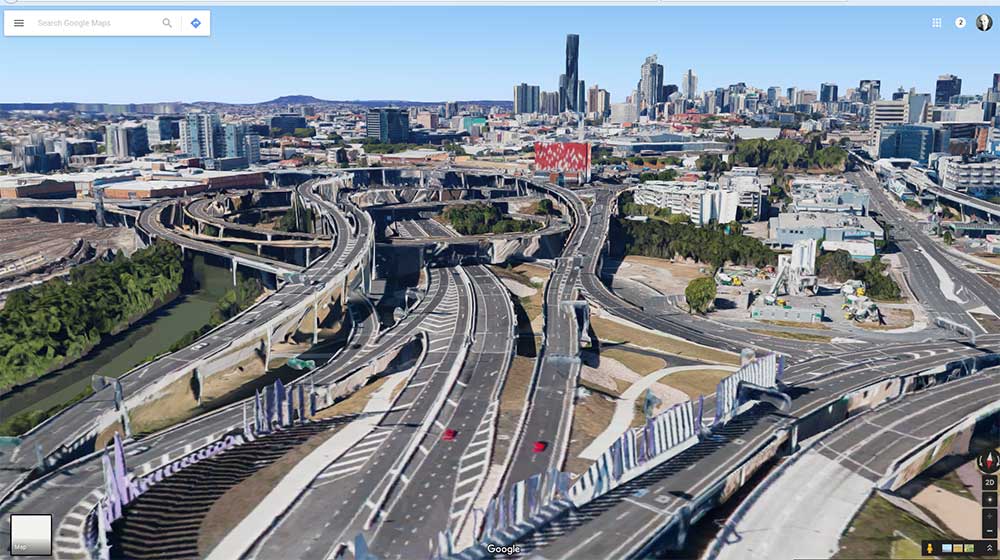
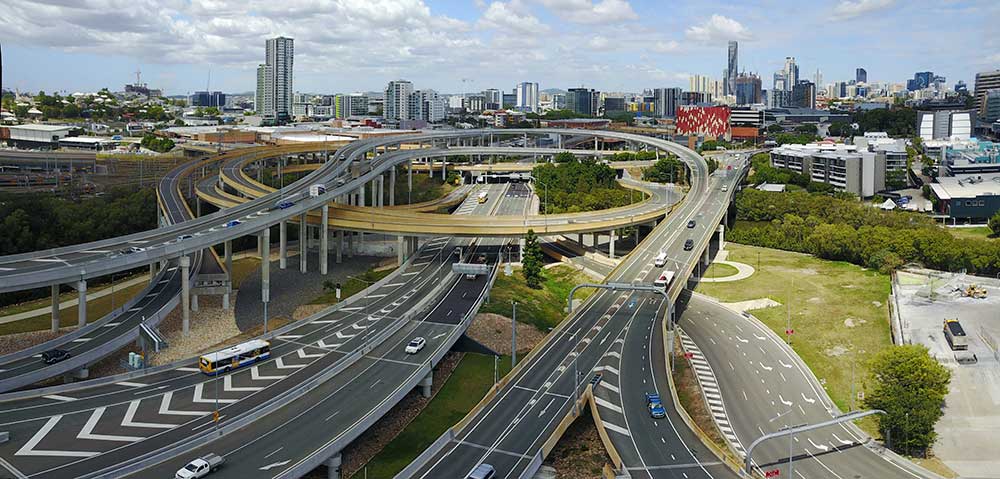
Finding interesting cityscapes using Google Maps will save time - 7 image panorama
Location scouting The ‘Gabba – Brisbane Cityscape Icon
Google Earth Pro was used to identify vacant blocks of land as suitable launch areas and to highlight any structure or objects in the immediate vicinity that might have posed a threat to the drone (in this case the MavicPro) such as power lines or mobile phone towers.

Drone safety – 6 things to check before you fly
- Is the drone airworthy – Closely look at the structural integrity of your aircraft, blades and camera gear
- is it legal to fly in the area – Prior to flying check that you are not operating in a No Fly Zone
- Is it safe to fly – Use Google Earth Pro prior to flying to scope launch areas to get an understanding of the surrounds
- Charged batteries – Does the drone battery/hand controller battery have adequate power supply for the flight
- If operating commercially – Are you registered with the relevant Federal/State/:Local government bodies
- Is there adequate insurance – Ensure adequate insurance when flying commercially
Remember to maintain situational awareness of the surrounds in which you are flying at all times.
Apps for Aerial Panorama Photography
When taking aerial drone panoramas, the drone can either be controlled manually (capturing images while the drone is rotated to get the desired image coverage) or by using IoS or Android apps on a smart device. Landscape and Cityscape panoramas destined for print or sharing on social media channels can be created by simply yawing the drone from right to left or visa versa and eyeballing the necessary overlap while taking the photographs. If the intent is to create 360 degree spherical panoramas such as 360-photos for Facebook then drone flight control apps such as Litchie or DronePan should be used as these programs are fully automatic and take the guess work out of how many images and necessary overlap are required.
What Panorama Stitching Software to use
Half the battle to creating a good drone panorama is the capturing of the images, the other half is being able to stitch all the images together to get the final composite. Fortunately there are specialised software programs to create high quality panoramas such Auto Pano Giga, PTGui, Microsoft ICE as well as Photoshop, the venerable swiss army knife of image processing.
Autopano Giga anf PTGui are both commercial software products with rich toolsets for creating planar and spherical panoramas while Microsoft ICE is free with fewer options to adjust stitching settings.
To get the best results out of any panorama stitching software, use a PC with the largest amount of RAM possible. While the final image quality is independent of RAM, more memory will speed up the stitching processing considerably.
Aerial Drone Panorama – Getting the BIG Picture
Conclusions
MavicPro Drone Panorama Photography is very challenging pursuit but ultimately very rewarding. Stay tuned, next we will show you how to take an image sequence and use Autopano Giga to produce a high resolution composite image.
If you like this content please share it on social media.